Saturday, November 17, 2018

Saga Campaign - Turn 1 Skald's Report

This will be posted to the ODMS website, but this is a precursor...


The Chronicles of Aerverdige Skald

Twas during the twilight of the Gods there arose a group of giants who stalked the earth in search of power, glory and dominion over their neighbours.  Whilst reputations may have dimmed in modern memory there was a time when these names resounded from the mountaintops and echoed through the fertile valleys of the world. To the east ruled Reimund Bjarnesen, Ragnar Lothbrok, Leidolf the Brave and Jagertha the Wise, while King Macbeth, Owen of Strathclyde and William MacDougal prowled the northern wastes. To the west were found Brian of Dublin, Fintan Mac Con Midhe, Lord Baker and Strom of Wessex. And to the south, the names Wulfric of Kent, Baldan the Bold and William the Bastard drew fear from the stoutest of hearts.
And so it was that war came to the land. Winter had but recently loosed its grip, when Jarl Lagertha raised her band to raid the Kingdom of Wessex. Strom stepped up to defend his lands and prevailed on sacred ground.  His reputation enhanced, Strom was hailed as his people's savior. His respite was short lived, however. The Viking blood that had consecrated the ground was barely dry when Strom's hubris rebounded, and his tired forces were called upon once more.  This time Baldan the Bold invaded. The Normans decimated Strom's forces and gained sovereignty over an outlying province of Wessex. Baldan's harsh policies almost caused his people to revolt, but they were quelled by new Warriors who joined the Lord's cause before bloodshed could erupt.  Strom, meanwhile, retired to lick his wounds and sent out the call to the Fyrd for bowmen, with no small success.
William the Bastard took advantage of Baldan's expedition to Wessex and invaded his Norman cousin's domain.  Rushing back to defend his fief, Baldan issued a challenge to William and the two nobles met at the Hazel Wands.  Rollo was Baldan's chosen whilst Rufus held William's confidence.  The battle between these two champions was long and mighty. It was not until the sun was high in the autumnal sky that Rollo landed the final, fatal blow - dashing Rufus to the ground, his blood consecrating the hallowed field.  William and his men rushed forward to avenge their brother's death and fell into Baldan's trap.  Despite celebrating for too long and being slow to engage, Baldan's forces enticed William into an ill-considered charge, severely wounding the noble Lord and sending him and his forces back to Normandy to lick his wounds. Unfortunately, the continuous fighting severely hurt Baldan's harvests and the victor will be hard pressed to feed his men for next season's adventurings.
Further to the west, Reimund Bjarnesen went hunting for lands on the Emerald Isle.  Brian of Dublin raised his army and defended Dublin successfully, severely wounding Reimund in the battle.  Despite destroying Dublin's main gateway, the Danes were forced to return to their ships empty handed. The people of Ireland were so heartened by their Warlord's success that they proclaimed his Great Ruler - and many were the songs that the Skalds told across the isle.
Meanwhile in the North, Owen of Strathclyde and Macbeth vowed to destroy the recent Viking settlements to the East of their Kingdoms. Unwilling to fully commit his forces to the cause, Owen decided to merely raid Leidolf - a task he successfully concluded, wounding Leidolf severely in the process, then returning to his Welsh fastness much encumbered by Norse gold. Macbeth was more sanguine, raising the Celtic Clans to descend like a whirlwind on one of Ragnar's villages, putting it to the torch, and sending his serfs scurrying back to their Lord and Master's domains. Macbeth kept the region for himself, the land being much fertile and pleasing to the monarch's eye, and levied a company from the area into his host.
In the South, Lord Baker launched a diversonary raid on one of Wulfric of Kent's towns, causing much damage to the buildngs and crops and returning to his holdings with much Saxon treasure. Not only was Wulfric prevented from aiding the other Anglo-Saxon king (Strom, of Wessex fame), but his defeat at Baker's hands caused such an upswelling of anger, the Wulfric was forced to remain in the area, stomping out the rebellion. It is perhaps fortunate that Wulfric's bailiffs quickly identified the ringleader, one Watt Fuller (a dyer from Detling Green). Wulfric had him hung from the village oak of Woulfburgh as a warning to other would-be malcontents. The traitor has put the Ceorls in an odd mood - one of their own has betrayed their oath! Wulfric has further let it be known that he has summoned the Heoru Dohtor to fight at his side instead of the Ceorls, should Wulfburgh be assailed next year. It will be many months before Wulfric fully trusts his men again....
As winter strengthened her icy grip on the world, the Warlords in their separate fastnesses gathered their faithful to their longhouses, reaped their harvests and herded their livestock to their protected barns. The mead was racked, the meat roasted, the skalds summoned, and the hours passed till the goddess of winter released her grip. Worshipped by many names - Skadi, Sceadu, Cailleach Bheur or Hodr - the deities will not be appeased for many months. But memories do not fade, and animosities will sprout renewed with the spring buds.

The  referee of the campaign is Stephen, and with all the players involved, he has done a great job of keeping it going.  We (November 2018) are about to start season two.  He adapted the rules from the first edition Saga campaign ideas.

Wednesday, August 8, 2018

New Articles posted by ODMS authors

Over at the ODMS website, there have been a couple of recent articles - these are two "how to" articles, explaining in some detail (suitable for a beginner to the rules) how to play two different games.

The first is Cold War Commander - which we have been using in the club recently to play some Modern Micro Armor games, mostly in the 1973 Egyptian/Israeli conflict (Sinai).
The second is Jagdpanzer - which will be used for some upcoming WW2 microarmor games.  These rules used to be played a long time ago at Campaign Headquarters by some of the earliest members of ODMS, in the late 1980s and early 1990s.  The rules date to 1985, but are still an excellent choice for fast play WW2 combined arms land combat.
Both of those articles can be found as pdf downloads at the ODMS website.


Sean has posted an excellent "player's guide" on the basics of David Brown's rule set General d'Armee.  These are great rules, and are designed to handle battles of a larger type than his earlier rules, General de Brigade.  Sean's article is located here, at his blog.

As an aside, there are a number of great articles and downloads available for both General d'Armee and General de Brigade, at David Brown's blog.  For instance - the FAQ and Index for General d'Armee.


Sunday, April 29, 2018

Hail Caesar - AAR April 28

April 28 was the club meeting and game day we held at the Virginia War Museum.

There was a room full of gamers there for the ODMS meeting in the morning (10:00am), but by Noon, the number had grown, as we added a few more gamers for a game day.

The games played were two, primarily - Heroes of Normandie, and Hail Caesar.  I was the referee for the Hail Caesar game, so here is the description.  There were six players, three on each side.  The Carthaginian side featured Rich (of CMS), a friend of his (Brian I think), and Justin as overall commander.  The Iberian side featured Richard, Stephen as overall commander, and David as the commander of the Gallic mercenaries.

History
The Carthaginians, during the period following the First Punic War, whence their fortunes were somewhat reduced, were led by the Barca clan to believe that new fortunes could be made by having a reinforced trade colony in Iberia.  Much of that effort was the various ports and colonies on the eastern coast of the Peninsula (Carthago Nova, for instance), but also the Phoenician bad boys wanted to push in country.  This led them to a conflict with the Oretani tribes. 

The Phoenicians had established the city of Tartessos at the mouth of the Baetis river, and now they had moved up the river, and constructed an inland port.  Raids by the local Oretani (a mix of Iberian, Celtic, and of course, Celtiberian) warbands made the area unsafe, so the Army was called in.  They moved in from the eastern coast, and began the ponderous job of crossing the river, to pacify the Oretani.

At that time, the Oretani tribes, alerted to the river crossing, struck!  They came down out of the hills and attacked the Carthaginians during their weakest moment, with half the army on each side of the river.


Scenario
In the game, the Carthaginians had four divisions of troops, two on each side of the river.  There was only one permanent (stonework) bridge that had been constructed for the colony, it could accommodate 1 unit of troops, per turn, crossing it.  Each division of troops has 4-5 units in it, so that is a nightmare.  Luckily, the Carthaginians had some engineers along, and were able to construct a hasty pontoon style bridge, to double their crossing capability.

Along the river, there were several mooring spots near the colony.  The Carthaginians had shipborn reinforcements (a fifth division of troops, very heavy, with 8 units).  But it would take turns to sail to the mooring spots nearest the action.  In addition, the Carthaginian players decided to build the pontoon bridge in such a way, that it masked one of the mooring spots (making it inaccessible).

So the pregame decision of the Cartho players was - where to place your pontoon bridge.  Too far up stream, and you lose tactical capability to relieve pressure on the main point of action.  But too far down stream, and you block potential landing areas for reinforcements.

The Iberians, on the other hand, had their own pregame decision.  They had a chest full of Lusitanian silver (as well as some Lusitanian soldiers who joined the cause).  With that silver, they could (1) hire Cilician pirates to attack the Carthaginian reinforcements (and attempt to sink some of them), or (2) hire Gallic Mercenaries.  The Iberian commander chose the second course of action.
The game was a disaster from the outset for the Carthaginian players.  They were not making their command rolls well, and they were commanded by all newbie players.  The Iberians had a couple of ancients players on their side.  Plus they were making very good command rolls, ensuring good moves (at least in the earliest turns).  Also, the scenario very harshly punished the Carthaginians.  In hindsight, I think I would have (1) made the landing points for the reinforcements more flexible, and (2) allowed more units to cross the bridges each turn.  But the scenario was to be the Barbarians catching a stronger Imperial power, while they were in the act of crossing a bridge.  That succeeded, but it could not have been much fun for the Carthaginians.  In spite of that, however, the Cartho players did seem to have a really good time, and they even had some great tactical successes.  Until the horde of Gauls descended on them - that proved to be too much, and it was time to call it a game.

In the meantime, it did encourage me to finish painting the Old Glory buildings used in the game, and to scratch build the pontoon bridge and the mooring spots (piers).  Including "Fisherman's Wharf" - shown here with the infamous Iberian Koi.

Saturday, April 21, 2018

DBA and Hail Caesar - AAR April 19 2018

This week, the club had its weekly gaming night at World's Best Comics.  There were a couple of Ancients games being played. 

First was a DBA game between Dave and Stephen.  (details to follow)

Second was a Hail Caesar game between Stephen and Chuck (playing Gauls) and Dave and James (playing Marian Romans).

Gauls taunting their Roman foes


The Hail Caesar game had 400 point armies on both sides. 

Hot action!  Gallic Infantry, ferocious charge against Roman line!

The Marian Roman army list consisted of:
3x units of Legionaires
3x units of Veteran Legionaires (Caesar's 10th?)
3x units of "Spanish" style light Legionaires
2x units of Germanic medium cavalry
1x unit of Numidian light cavalry
2x units of Roman skirmishers (small units, with javelin)
3x division commanders (1 was commander in chief)

The Gallic army list consisted of:
1x unit of Gaesatae (naked fanatics)
1x unit of General's bodyguard (cool, professional soldiers)
7x units of Warband (large units, with javelin and sword)
2x units of medium cavalry
1x unit of light cavalry
2x units of skirmishers (small units, with sling)
3x division commanders (1 was commander in chief)


Gaesatae (from behind) Ready to throw themselves on the Romans!
The game progressed pretty well, with three divisions on each side (roughly four units per division, not counting the skirmishers).  The Roman's (albeit in a pretty good position) finally lost the battle when the second of their divisions breaking. 
Gaul line meets Roman line (Gallic division commander riding in a chariot)
 Some interesting effects of the game system's command and control system - the Gallic cavalry, on the right flank, did not want to activate the first two turns of the game, which almost left the right flank of the army open to a unit of German cavalry, supported by the mounted Numidians.

Gauls approaching the Roman testudo formations!

The Roman legionaire units all began the game in testudo formation, and that combined with their training, meant they could execute a move every turn, regardless of their command and control dice results.

Gallic second line advances (ignore the Persian styling on the C-in-C chariot)

The game was a learning one for most of us, and we got a few things wrong as we work through the rules, but we planned to try it again in a few weeks, the basic rules being pretty enjoyable, and offering up some interesting tactical solutions (like unit support in combat, interesting flank move possibilities, and lots of great army lists and unit types).


Maybe this'll happen next time, Romans

Friday, March 16, 2018

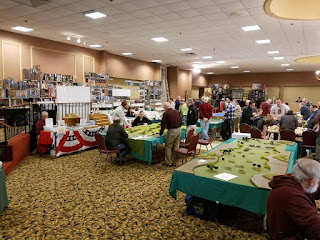
Williamsburg Muster 2018 was a Huge Success!

A great convention, with almost 200 gamers, as well as lots of staff (who also played games) and great vendors presenting all sorts of wares for sale.


Check out the Facebook site for updates and tons and tons of pictures and game AARs.