Friday, November 11, 2022

Club Officer Election, August 2022

 We missed several annual business meetings, and officer elections, during 2020-2021, mostly due to the great COVID disruption.  However, in August of 2022, we had an emergency out-of-cycle annual meeting, that took place at the Guns of August convention in Newport News.

The newly elected officers are:

President, Christopher Garcia
Vice President, Tim Grabowski
Treasurer, Jim Russell
Communications, James Curtis

The five at large board members are:

John Snelling
John Callahan
Stephen Preston
Justin Grabowski
Chuck Turnitsa


In spring of 2023, we plan to return to our usual annual tempo of meetings, which means that we will have elections each year, for roughly half of our officers.

Spring of 2023 (nominations announced in March, elections held in April):
 President, Treasurer, Three board members (Snelling, Preston, Turnitsa)

Spring of 2024 (nominations announced in March, elections held in April):
 Vice President, Communications, Two board members (Grabowski, Callahan)


Friday, March 4, 2022

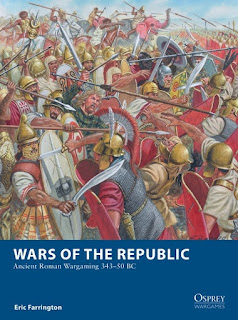
Wars of the Republic - a short review


Last night (March 3, 2022) we had a play through of Wars of the Republic. This is a ruleset published by Osprey, written by Eric Farrington, and based on his earlier ruleset, Men of Bronze. 
 
Here is a short analytical review.
There are a lot of things going on with this ruleset, so I am going to break this review up into 5 different areas:
 
1. Look/Presentation
2. Organization/Ease of Use
3. Rules Systems
4. Troop Types/Army Lists
5. Scenarios, Campaigns, Extras
 
1. Look - like all the Osprey wargaming books, this one looks great with lots of artwork from Osprey pubs of the period of about 500BC up to about the year 1AD. Great cover art, great interior art. Only complaint - some of the charts have small print - although here it is much better than in some of the earlier Osprey wargame books.
 
2. Organization/Ease of Use - The book is organized pretty well. Starts out with defining concepts and assumptions, then the turn sequence, then the basic mechanics (move, shoot, fight, morale) and then extra abilities. This is all followed up by some scenarios (fictional and historical), and a set of campaign rules. As far as Ease of Use - there are some big problems with out the turn sequence and activation language is presented (some inconsistencies, and some contradictions) - these would benefit very greatly from a detailed phase by phase example
 
3. Rules Systems - I like all the rule subsystems, they work well. The turn structure (and what counts as an activation, and what doesn't) needs some more explanation or examples, see above, but otherwise the basics of move, shoot, fight and how it is executed is well presented (this is what makes me want to get info from the author and play again).
 
4. Troop Types - all the basic troop types you would expect are here, however we had some serious questions about some of the values used. For instance, once a Roman Legion unit (of any of several types available) goes into "Legion" formation, it is all but indestructible. This does not ring true with some of the battle results from the ancient sources. Other formations seem a lot more sensible, but "Legion" crosses a line. Also, one or two troop types have problematic values, which might arise from typos (such as Light Infantry having a value called "Courage" which represents your ability to absorb hits - it is higher for Light Infantry than it is for Legion or Phalanx troops....). The Army Lists, in terms of units and numbers are pretty good, but the point system is too simple to be useful - there are some real discrepancies when you compare units of the same cost...
 
5. Scenarios, Campaigns, Etc - Great scenarios and campaign rules, could be useful here or maybe adapted to other rules systems. Reminds me of the scenarios, etc, you get in both Warhammer Ancients products and also some of the SAGA books. One thing missing - a Quick Reference Sheet - I made one.
Bottom line - the rules systems are good. Playing the game in a Roman Civil War, or Diadochi (Successors) battle, with similar armies should be fine, but I have written to the author to find out some answers to questions. The points system should be ignored (and only play scenario games) or revamped.
 
Prognosis - probably worth trying to tinker with, although there are a lot of good rule sets out there for Ancients.

Thursday, October 28, 2021

Scenarios for Wargames

Recently, I have been thinking about wargame scenarios. There are a lot of excellent sources for scenarios out there. Many are collected either as an addendum to a rule book, or gathered into a separate publication supporting a rule set. Some excellent examples are the scenario books published for rule sets such as Fire and Fury, Napoleon’s Battles, British Grenadier and General de Brigade… and many others.


There are some excellent sets of generic scenarios for different periods such as the English Civil War books from Caliver Books and the series of ancient and medieval battle books by Peter Sides.  Many rule sets put out volumes of special rules and army lists for particular periods and theaters.  Warhammer Ancient Battles, Flames of War and Bolt Action have some of the best of these.


All of this got me thinking. I have written professionally about what it is that constitutes a centric for professional simulation and wargaming (such as what the Department of Defense does), and my own taxonomy of what a scenario includes is based on this breakdown of four parts:

  1. Context (background for the battle, I.e. why are they fighting?)
  2. Environment (map, setting, lighting, weather, etc.)
  3. Participants (combatants, unit details, non-combatants, allies, etc.)
  4. Timing (start of the battle, timing for events like reinforcements or weather change, etc.)

That list is intended as a recipe for many different types of scenarios, including regular warfare, as well as political or economic games.

The US Army uses a structure called METT-T to describe a scenario description.  It breaks down some of my elements into more detail, and does not include some of the wider picture things (like timing of some events that might occur during the fight, or the ‘road to war’ description of why the fight is taking place).  METT-T stands for:

  1. Mission
  2. Enemy
  3. Terrain
  4. Troops
  5. Time Available


In both cases, my own list, and the US Army list, I could not help but be aware of how good the various Charles Grant books on scenario cover that material.  Another great example are the wonderful scenarios that Gene McCoy put into his old magazine, Wargamer’s Digest.


Monday, September 27, 2021

Scaled units for WW2 Skirmish Wargaming

WHAT ARE WE TALKING ABOUT?

 One of the things that is rare in the spread of popular current WW2 skirmish games, is the type of game where each maneuver element (i.e. game piece - whether that is a vehicle model, or a stand of infantry models) represents a squad, section, or platoon.  In games such as Chain of Command, Bolt Action, I Ain't Been Shot Mum, or What-a-Tanker each piece represents one entity (a tank represents 1 tank, and a soldier model represents one soldier).  Flames of War was a stranger mix - each vehicle represented one tank (or gun, halftrack, etc) but infantry was mounted on stands, representing (roughly) sections or squads.  Those types of games are fine, but they limit the ability to represent larger battles.


Other games, such as Blitzkrieg Commander (2006) have each piece represent a platoon (this is true, even of the new Pendraken released Version IV).  The newest version of Rapid Fire (1994), Rapid Fire Reloaded, uses a scale where each vehicle (or gun) model represents 5 real life vehicles (roughly a platoon), and an infantry figure represents 15 men, so a stand of two figures represents (roughly) a 30 man platoon.


When a stand represents a platoon, or part of a platoon, you don't have as much problem moving your infantry units.  They tend to act as a fighting unit (sometimes with support weapons included, sometimes they are separate stands of models).  When you have rules representing a platoon of tanks as a single model, you don't need as much detail (i.e. "rivet counting") in the tank rules, as you do when you are playing a single tank to tank engagement.  That sort of combat is well represented in many, many rulesets aimed at playing micro armor, and skirmish sets like What a Tanker. 


HOW IS ODMS PLAYING THIS SCALE?

Recently I hosted, for ODMS, a Thursday night game using a set of rules that were cobbled together, but that represented this scale fairly well.

They were based on the Neil Thomas World War 2 rules, from his book, "Wargaming an Introduction".  In the book, an infantry section (representing 9 men) is represented on the table top as 9 model soldiers, split up to three stands of three. Shooting and Casualties, in the rules as written, are per man.  However, I borrowed some very good looking house rules from a blog called Sound Officers Call.


With the house rules, we were able to represent infantry as a stand per section, or three sections per platoon.  The sections could act independently from each other, and if the section had an attached heavy weapon team (mortar, HMG, anti-tank weapon, etc), you would signify that with an attached stand with the weapon.


This system worked pretty well, and overall the rules were OKAY, although extremely light weight.  I think the desire would be to dress them up and add a little more detail, without going overboard.  Looking around and discussing online, I got a recommendation to take a look at a ruleset called Ostfront. These are very roughly similar to the modified Neil Thomas rules, but a stand of infantry is either an Assault Infantry section (such as you would find in an armored car, or half track - Panzer grenadiers, or US Armored Infantry), or a half platoon (with two stands needed to make a platoon).  One of the benefits of the Ostfront rules over the Neil Thomas is that there is just a little more detail to the vehicles and weapons.  The mechanisms for shooting and killing are the same (tank and antitank - roll 1d6 to hit, and 1d6 for effect; infantry similar).  It has much better rules to integrate artillery, field guns, and soft transport vehicles, all without adding to the complexity of the rules. Because vehicles have more detail to them, there are national OB books, such as this one on the Soviet Forces. However, there is also a quick-fire (quick start) version of the rules, that also contains basic vehicle information for US, German, British and Russian nationalities.

WHAT ELSE IS THERE?

Other similar scale games include Crossfire (1996) - which focuses primarily on Infantry.  Here the stands represent sections, but are kept together in platoons (three sections, and a commander, make up a platoon), and groups of platoons make companies and eventually battalions. Crossfire has a lot going for it as an innovative rule set, but the representation scale allows the player to make battalion command level decisions.  Poor Bloody Infantry, from Peter Pig, is similar to this.  A unit is a platoon, but it might include a stand for the platoon command, and two stands for LMGs, and then 4 or 5 stands for infantry rifle groups.  Altogether, a platoon.  Rommel, a great system from Sam Mustafa, is larger level of abstraction, where an element (vehicle or stand of infantry) is representing a whole company.


Older rule sets at this scale would have to include Command Decision (1986), originally from GDW. The Angriffe (1968) rules had infantry stands, representing a group, although like the unmodified Neil Thomas rules,  group of 10 infantry was recommended to be represented on the tabletop by a stand with 10 model soldiers (so command by group, but represented 1 to 1).  One area where the 1 model representing a platoon vibe really took hold - and where a player (or side of players) would be commanding a battlefield force representing (more or less) a battalion or two, was the Series 76 scenarios that Gene McCoy published in his Wargamer's Digest magazine.  Those were quite excellent, and over the years pieces and parts of a ruleset were hinted at by Gene, or you could play it using either Angriffe or Tractics, but each model represented a platoon of vehicles, or a stand of infantry represented a platoon of infantry.

BENEFITS OF THIS SCALE

The benefit of games at this scale (rather than at the 1 miniature = 1 soldier scale) is that you can act as if you are a Battalion Commander.  Making the sorts of rules, and commanding the support equipment that a Battalion Commander would have.  In command, a player would normally be concerned with the actions of two units below his/her level (as described by some, for real life command situations).  So, a Battalion commander would be concerned with the actions of Companies and Platoons.  The commander would have access to support elements such as artillery and maybe could tap into elements from up to 2 levels above him, with permission, but is concerned with the scenario and battlefield objectives that a battalion commander would focus on.  This opens up a very wide variety of wargaming scenarios - much more so than the player who is running individual soldiers (such as in Bolt Action or Chain of Command).

Ever since the sharp decline of interest in Flames of War a few years ago, ODMS has not had a lot of 15mm WW2 action.  We had a lot of micro-armor being played in 2019 before the pandemic, and likewise a lot of 28mm skirmish (with Bolt Action and What-A-Tanker!).  Hopefully we will be playing some more 15mm WW2 very soon.

Saturday, November 17, 2018

Saga Campaign - Turn 1 Skald's Report

This will be posted to the ODMS website, but this is a precursor...


The Chronicles of Aerverdige Skald

Twas during the twilight of the Gods there arose a group of giants who stalked the earth in search of power, glory and dominion over their neighbours.  Whilst reputations may have dimmed in modern memory there was a time when these names resounded from the mountaintops and echoed through the fertile valleys of the world. To the east ruled Reimund Bjarnesen, Ragnar Lothbrok, Leidolf the Brave and Jagertha the Wise, while King Macbeth, Owen of Strathclyde and William MacDougal prowled the northern wastes. To the west were found Brian of Dublin, Fintan Mac Con Midhe, Lord Baker and Strom of Wessex. And to the south, the names Wulfric of Kent, Baldan the Bold and William the Bastard drew fear from the stoutest of hearts.
And so it was that war came to the land. Winter had but recently loosed its grip, when Jarl Lagertha raised her band to raid the Kingdom of Wessex. Strom stepped up to defend his lands and prevailed on sacred ground.  His reputation enhanced, Strom was hailed as his people's savior. His respite was short lived, however. The Viking blood that had consecrated the ground was barely dry when Strom's hubris rebounded, and his tired forces were called upon once more.  This time Baldan the Bold invaded. The Normans decimated Strom's forces and gained sovereignty over an outlying province of Wessex. Baldan's harsh policies almost caused his people to revolt, but they were quelled by new Warriors who joined the Lord's cause before bloodshed could erupt.  Strom, meanwhile, retired to lick his wounds and sent out the call to the Fyrd for bowmen, with no small success.
William the Bastard took advantage of Baldan's expedition to Wessex and invaded his Norman cousin's domain.  Rushing back to defend his fief, Baldan issued a challenge to William and the two nobles met at the Hazel Wands.  Rollo was Baldan's chosen whilst Rufus held William's confidence.  The battle between these two champions was long and mighty. It was not until the sun was high in the autumnal sky that Rollo landed the final, fatal blow - dashing Rufus to the ground, his blood consecrating the hallowed field.  William and his men rushed forward to avenge their brother's death and fell into Baldan's trap.  Despite celebrating for too long and being slow to engage, Baldan's forces enticed William into an ill-considered charge, severely wounding the noble Lord and sending him and his forces back to Normandy to lick his wounds. Unfortunately, the continuous fighting severely hurt Baldan's harvests and the victor will be hard pressed to feed his men for next season's adventurings.
Further to the west, Reimund Bjarnesen went hunting for lands on the Emerald Isle.  Brian of Dublin raised his army and defended Dublin successfully, severely wounding Reimund in the battle.  Despite destroying Dublin's main gateway, the Danes were forced to return to their ships empty handed. The people of Ireland were so heartened by their Warlord's success that they proclaimed his Great Ruler - and many were the songs that the Skalds told across the isle.
Meanwhile in the North, Owen of Strathclyde and Macbeth vowed to destroy the recent Viking settlements to the East of their Kingdoms. Unwilling to fully commit his forces to the cause, Owen decided to merely raid Leidolf - a task he successfully concluded, wounding Leidolf severely in the process, then returning to his Welsh fastness much encumbered by Norse gold. Macbeth was more sanguine, raising the Celtic Clans to descend like a whirlwind on one of Ragnar's villages, putting it to the torch, and sending his serfs scurrying back to their Lord and Master's domains. Macbeth kept the region for himself, the land being much fertile and pleasing to the monarch's eye, and levied a company from the area into his host.
In the South, Lord Baker launched a diversonary raid on one of Wulfric of Kent's towns, causing much damage to the buildngs and crops and returning to his holdings with much Saxon treasure. Not only was Wulfric prevented from aiding the other Anglo-Saxon king (Strom, of Wessex fame), but his defeat at Baker's hands caused such an upswelling of anger, the Wulfric was forced to remain in the area, stomping out the rebellion. It is perhaps fortunate that Wulfric's bailiffs quickly identified the ringleader, one Watt Fuller (a dyer from Detling Green). Wulfric had him hung from the village oak of Woulfburgh as a warning to other would-be malcontents. The traitor has put the Ceorls in an odd mood - one of their own has betrayed their oath! Wulfric has further let it be known that he has summoned the Heoru Dohtor to fight at his side instead of the Ceorls, should Wulfburgh be assailed next year. It will be many months before Wulfric fully trusts his men again....
As winter strengthened her icy grip on the world, the Warlords in their separate fastnesses gathered their faithful to their longhouses, reaped their harvests and herded their livestock to their protected barns. The mead was racked, the meat roasted, the skalds summoned, and the hours passed till the goddess of winter released her grip. Worshipped by many names - Skadi, Sceadu, Cailleach Bheur or Hodr - the deities will not be appeased for many months. But memories do not fade, and animosities will sprout renewed with the spring buds.

The  referee of the campaign is Stephen, and with all the players involved, he has done a great job of keeping it going.  We (November 2018) are about to start season two.  He adapted the rules from the first edition Saga campaign ideas.

Wednesday, August 8, 2018

New Articles posted by ODMS authors

Over at the ODMS website, there have been a couple of recent articles - these are two "how to" articles, explaining in some detail (suitable for a beginner to the rules) how to play two different games.

The first is Cold War Commander - which we have been using in the club recently to play some Modern Micro Armor games, mostly in the 1973 Egyptian/Israeli conflict (Sinai).
The second is Jagdpanzer - which will be used for some upcoming WW2 microarmor games.  These rules used to be played a long time ago at Campaign Headquarters by some of the earliest members of ODMS, in the late 1980s and early 1990s.  The rules date to 1985, but are still an excellent choice for fast play WW2 combined arms land combat.
Both of those articles can be found as pdf downloads at the ODMS website.


Sean has posted an excellent "player's guide" on the basics of David Brown's rule set General d'Armee.  These are great rules, and are designed to handle battles of a larger type than his earlier rules, General de Brigade.  Sean's article is located here, at his blog.

As an aside, there are a number of great articles and downloads available for both General d'Armee and General de Brigade, at David Brown's blog.  For instance - the FAQ and Index for General d'Armee.


Sunday, April 29, 2018

Hail Caesar - AAR April 28

April 28 was the club meeting and game day we held at the Virginia War Museum.

There was a room full of gamers there for the ODMS meeting in the morning (10:00am), but by Noon, the number had grown, as we added a few more gamers for a game day.

The games played were two, primarily - Heroes of Normandie, and Hail Caesar.  I was the referee for the Hail Caesar game, so here is the description.  There were six players, three on each side.  The Carthaginian side featured Rich (of CMS), a friend of his (Brian I think), and Justin as overall commander.  The Iberian side featured Richard, Stephen as overall commander, and David as the commander of the Gallic mercenaries.

History
The Carthaginians, during the period following the First Punic War, whence their fortunes were somewhat reduced, were led by the Barca clan to believe that new fortunes could be made by having a reinforced trade colony in Iberia.  Much of that effort was the various ports and colonies on the eastern coast of the Peninsula (Carthago Nova, for instance), but also the Phoenician bad boys wanted to push in country.  This led them to a conflict with the Oretani tribes. 

The Phoenicians had established the city of Tartessos at the mouth of the Baetis river, and now they had moved up the river, and constructed an inland port.  Raids by the local Oretani (a mix of Iberian, Celtic, and of course, Celtiberian) warbands made the area unsafe, so the Army was called in.  They moved in from the eastern coast, and began the ponderous job of crossing the river, to pacify the Oretani.

At that time, the Oretani tribes, alerted to the river crossing, struck!  They came down out of the hills and attacked the Carthaginians during their weakest moment, with half the army on each side of the river.


Scenario
In the game, the Carthaginians had four divisions of troops, two on each side of the river.  There was only one permanent (stonework) bridge that had been constructed for the colony, it could accommodate 1 unit of troops, per turn, crossing it.  Each division of troops has 4-5 units in it, so that is a nightmare.  Luckily, the Carthaginians had some engineers along, and were able to construct a hasty pontoon style bridge, to double their crossing capability.

Along the river, there were several mooring spots near the colony.  The Carthaginians had shipborn reinforcements (a fifth division of troops, very heavy, with 8 units).  But it would take turns to sail to the mooring spots nearest the action.  In addition, the Carthaginian players decided to build the pontoon bridge in such a way, that it masked one of the mooring spots (making it inaccessible).

So the pregame decision of the Cartho players was - where to place your pontoon bridge.  Too far up stream, and you lose tactical capability to relieve pressure on the main point of action.  But too far down stream, and you block potential landing areas for reinforcements.

The Iberians, on the other hand, had their own pregame decision.  They had a chest full of Lusitanian silver (as well as some Lusitanian soldiers who joined the cause).  With that silver, they could (1) hire Cilician pirates to attack the Carthaginian reinforcements (and attempt to sink some of them), or (2) hire Gallic Mercenaries.  The Iberian commander chose the second course of action.
The game was a disaster from the outset for the Carthaginian players.  They were not making their command rolls well, and they were commanded by all newbie players.  The Iberians had a couple of ancients players on their side.  Plus they were making very good command rolls, ensuring good moves (at least in the earliest turns).  Also, the scenario very harshly punished the Carthaginians.  In hindsight, I think I would have (1) made the landing points for the reinforcements more flexible, and (2) allowed more units to cross the bridges each turn.  But the scenario was to be the Barbarians catching a stronger Imperial power, while they were in the act of crossing a bridge.  That succeeded, but it could not have been much fun for the Carthaginians.  In spite of that, however, the Cartho players did seem to have a really good time, and they even had some great tactical successes.  Until the horde of Gauls descended on them - that proved to be too much, and it was time to call it a game.

In the meantime, it did encourage me to finish painting the Old Glory buildings used in the game, and to scratch build the pontoon bridge and the mooring spots (piers).  Including "Fisherman's Wharf" - shown here with the infamous Iberian Koi.